Friday, April 30, 2010

Friday, March 12, 2010

First Afghan Complete!!

DONE! (except for the blocking)

I finished the clouds as I described in my previous blog.

I then knitted the border in a nice "Antique Taupe" color to make it look like a picture frame as my fiance had suggested. The book didn't make any mention of how to handle the corners, so at first I was a little perplexed about how to do them. I considered knitting the sides long enough to fill the corners and the top and bottom just wide enough for the afghan itself. I didn't like the idea though. It just wouldn't look right. Then it hit me! Why not knit the corner as I went and make the entire border a single piece? So that's what I did. As you can see, I also made it so that the corner has a diagonal line like the corner of a picture frame would have. Here's what I did. I knit every row. On each right side row I simply knit one less stitch than the previous right side row, left unknit stitches on the left needle, turned, and knit back on the wrong side. After getting down to one stitch, I simply did the same process in reverse, and started picking up one of the left behind stitches on each right side row. In knitting terms it would look something like this...

Row 1 (wrong side): K10
Row 2: k9, leave remaining stitch on what is now your left needle, turn
Row 3: k9
Row 4: k8, leave 2 stitches on left needle, turn
Row 5: k8
Row 6: k7, leave 3 stitches on left needle, turn
.
etc.
.
Row 20: k2, leave 8 stitches on left needle, turn
Row 21: k2
Row 22: k3, leave 7 stitches on left needle, turn
.
etc.

With the border complete, it was then time to "sew" the foot pocket and attach the border. 8 hours of matress stitching later...


As much as I'd love to send it to my neice now, we've decided that we're going to hold on to it until September to enter it in the Tri-State Fair. Maybe I can win a blue ribbon to accompany the afghan.

It will wind up just in time to be a bit of an early second birthday present.
=)

Tuesday, February 23, 2010

My first afghan


A while back we bought this wonderful book "50 Fabulous Knit Stitches" by Rita Weiss and I had decided to begin knitting a swatch of every one of the 50 Knit Patterns within it. This would give us an idea of how the patterns behaved rather than just how they looked stretched out in a photo (not to mention it would be a great introduction to reading patterns, all sorts of increases and decreases, cabling, bobbles, etc., since up to this point all I'd done is knits and purls). I was going to split the pages of the book and reassemble the book to include swatches with every page in a ringed binder that could accommodate the added bulk of the swatches.

Well, having finally finished scarves for all my nieces and both my sisters, it was time to start that project. About a third of the way through I became inspired by a few patterns in the book to design my first afghan for my youngest niece, now just 15 months old.

At the bottom of the afghan I've used green and stockinette to create a 6in panel that I will fold under and attach on the back side of the afghan for a little foot pocket (How annoying is it to have to try to fold an afghan under your feet? Try it when you're not even TWO!). I then continued with the same green but added a lime colored eyelash yarn to make a section of grass.

Once that section was through, the real "fun" began... The Golden Glories from page 20 of Rita's book accompanied with a background of blue "Raindrops" from page 11. The flowers are in solid color in the book, but I was SURE that I could one up the pattern and make the flower centers yellow, make the bobbles for the petals a different color and make the leaves and stem section green!

Of course, to do this without passing yarn across the back and making big loops for toes to snag on that means different balls of yarn for every color change... Oh My Gosh! 5 flowers, 6 background sections between them... That's ELEVEN balls of yarn during the leaves... Umm... WAIT!... That's TWENTY-ONE balls of yarn during the Flowers! (2 for the bobbles / petals, one for the yellow center to avoid carrying yarn across the back for toe snagging / being seen through the holes in the yellow section, times 5 + 6 background balls)...

How to keep it all organized?! Well... Since knitting on circular needles forces you to cross the threads to the balls it can become an unorganized mess in 2 seconds flat. We don't have any straight needles long enough to comfortable accommodate an afghan, but since we have the Addi Click needle set (a MUST HAVE if you don't have them), what I did was to use 2 cables, each cable having a US 10 and US 15 on each end. Thus I could knit from one cable to the other using the 10's and the 15's would serve as a stopper to prevent the work from falling off the other end. When I switch sides of the work, I moved to the chair on the other side of the lined up balls and flipped the work end over end in order to prevent having to turn the work and cross all the threads. (Oh, you can't see the chair, but there's a chair on the other side of the coffee cups facing the couch I'm sitting on.)

I'm not even close to finishing, but here are a few shots of the work in progress...


As you can see from the last photo, the back of the flowers is clean and nearly as good as the front.

The plan is to continue with the rain for another foot or so, then switch to white for clouds and using the "Puffs" pattern on page 36 of Rita's book with some alterations to create bigger puffs, I'll make the clouds puffy. Then I'll use a Border from Rita Weiss's other book, "50 Fabulous Knitted Borders" to trim it all out.
More to come later, from "The Knit Snob".

Pfft, forget the Pseudo-argyle...

... I can surely do the real thing!

So there we were shopping for more yarn at Joann Fabrics so I could make a scarf for each of my sisters. There it was! The prettiest variegated yarns we'd seen to date, green, brown, and red/orange. Debbie Mumm "Traditions" yarn made specially for Joann's.

I could already see the scarves in completion for both my sisters. Green outside, brown up the middle and the red/orange crisscrossing for one sister, and green / brown swapped for the other.

I sat down and made the pattern on MS Paint with the crisscrossing color three stitches wide to really bring out the color of the red/orange... I splayed out 5 skeins of yarn (again, so I wouldn't have to pass the outside color across the back and it would be nearly as presentable on the back as the front) and off I went.

As you can see, the color change in the variegation wasn't quite as quick as I expected and the red/orange didn't change all that much, but it was what it was and I wasn't going to stop.


Yes, that's me in a PINK bandana! My hair was in my face and it was the only one we had... that was quickly remedied by a trip to Wally World where pink was replaced with white. Note also the interesting way that this yarn didn't knit in the traditional V shape. All the left slanting parts of the V wound up lining up in a straight column while the right slanting parts of the V made a spiraling column. Interesting. I'm not sure why it happened, but it happened on both scarves and we decided that we liked it.
Once again. I'm REALLY "The Knit Snob" for turning out these two beauties!

Knitting in multiple colors

Five scarves done! What to do now...
I had the "brilliant" idea of using some left over beige wool and two of the variegated yarns from my nieces' scarves in order to make a special scarf for their Grandma (my Mom). Remembering the diamond pattern of my first scarf, I decided on a similar design for Mom's with the diamonds split into colored quadrants of the nieces remnants. Off I went...
HOLES! There are holes on every other row where the colors meet! Rrriiiiiipp!
I scoured the Internet including www.knittinghelp.com and completely overlooked or misunderstood the video on two color knitting... Not to worry, I devised a way of knitting the two meeting colors together into the same stitch then passing the color I didn't want to keep over the one that I did want to keep before knitting the next stitch. This way the holes didn't appear... Here is the final result.

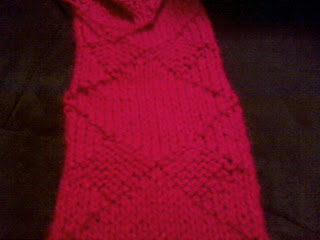
What you can't see is that where the filled diamonds are, I added another skein of beige to keep from having to pass yarn across the back, thus the back looks nearly identical to the front and is wearable as a scarf! What you also can't see is that where I passed the unwanted colors over to keep the holes from appearing, it left the stitches puffed out in front... this was unacceptable!

So back to the Internet and www.knittinghelp.com, where I found the video on knitting multiple colors (again probably but I understood it this time).

I knit the whole thing again! The proper way there were no puffy stitches and because it was much faster and easier than my made up method, I knit every other diamond with color instead of skipping some in the middle of the scarf.

No pictures, but Mom just loved it and has showed it off to all her craft guilds.

Once again, my loving fiance dubbed me "The Knit Snob" for teaching myself to knit argyle (pseudo argyle as it was).

Four to go...

With the first scarf done and looking good (thanks to Pam for a crocheted border), it was time to find yarn for my other nieces and get to work making them each a scarf...

I decided this time to simply alternate knits and pearls with variegated yarn and create a checkerboard pattern...


Yes, once again I was dubbed "The Knit Snob", though this time due to relative speed and lack of mistakes... The legend grows...

The Knit Snob

So says my fiance!

As I sat watching TV with Pam knitting beside me, I decided that I might as well learn to knit too. I mean, so what if I'm a guy! It's something we can do together and think of all the presents I could make for my 5 nieces! So out of the blue (for her at least) I asked her to teach me how to knit.

When the shock finally left her she agreed. I've been hooked ever since.
For me, knitting has opened a creative side of my mathematical mind that I never thought existed.

It all started with a little test swatch in red yarn. Pam was astounded to see that within a few rows my tension was good and my stitches were uniform (I don't know what else she expected from one so anal as myself!) so the creation stage began!

Not knowing how to read all the knitting pattern abbreviations and not wanting to jump in head first without knowing how deep the waters were, I decided to knit a small scarf for my newest niece, Lorelai. Using just knits and pearls and the red yarn, I designed a subtle diamond pattern on some graph paper and got to work.


Proud of me as she was, she still dubbed me "The Knit Snob" as I was sharing my self designed scarf to a friend of ours. The name has stuck!